
Day one on the job and you've been tasked with building the first Avid Project? Fret not! This guide will walk you through all of the steps of creating your first Avid Project, from creation to being ready to bring in media and get cutting.
Building an Avid Project
After Media Composer launches, navigate to the "New Project" tab. Here, you will set the project name, project format, and where the new project will be saved.
Setting the Drive Location
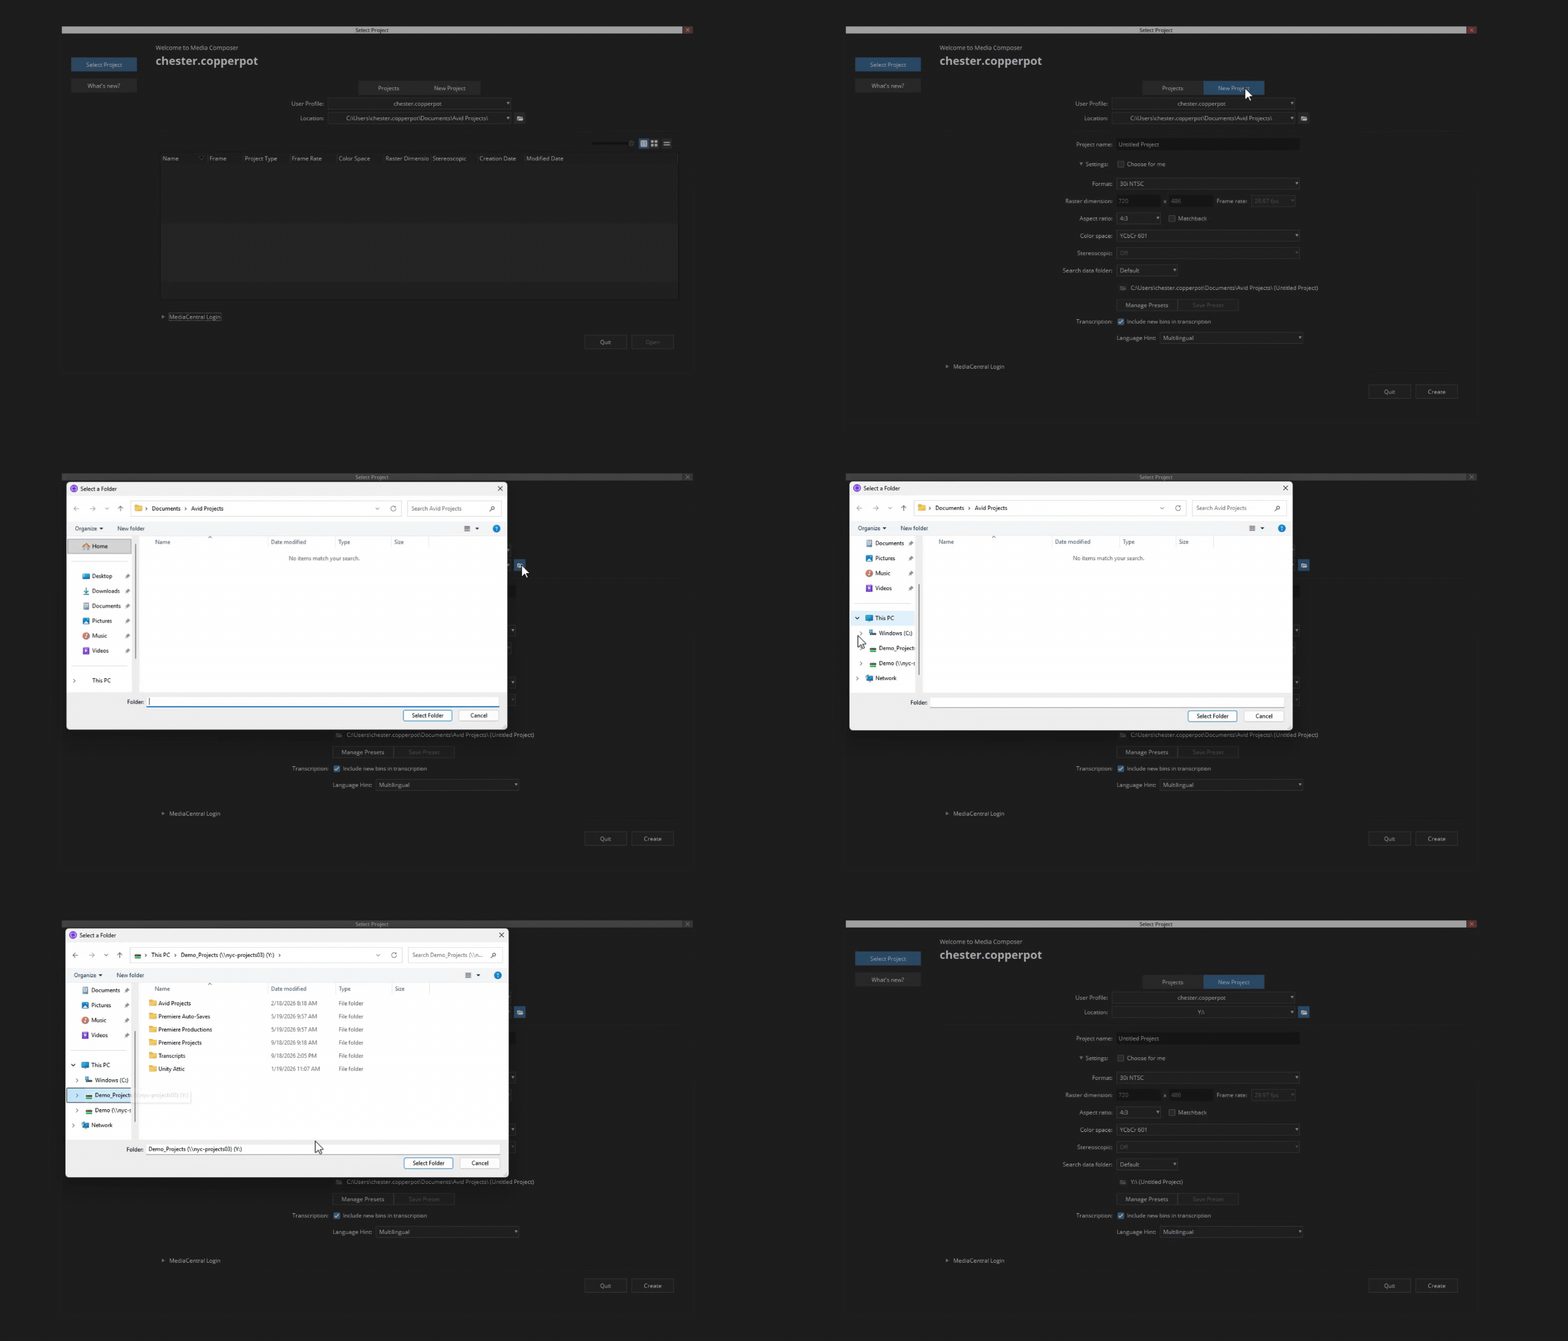
When creating an Avid Project, it's important to make sure that the projects are being saved to the correct shared storage location and that they are organized into a separate "Avid Projects" folder off the root of the drive. Here are the steps:
- Click on the Folder icon next to "Location"
- Navigate to your production's projects drive on the shared storage
- Once here, if it has not been created already, create a folder called "Avid Projects"
- Click "Select Folder"
Naming Your Avid Project
When naming your Avid Project, remember to use "_" for spaces and avoid using special characters like !@#$%^&*()
Setting the Project's Format and Frame Rate
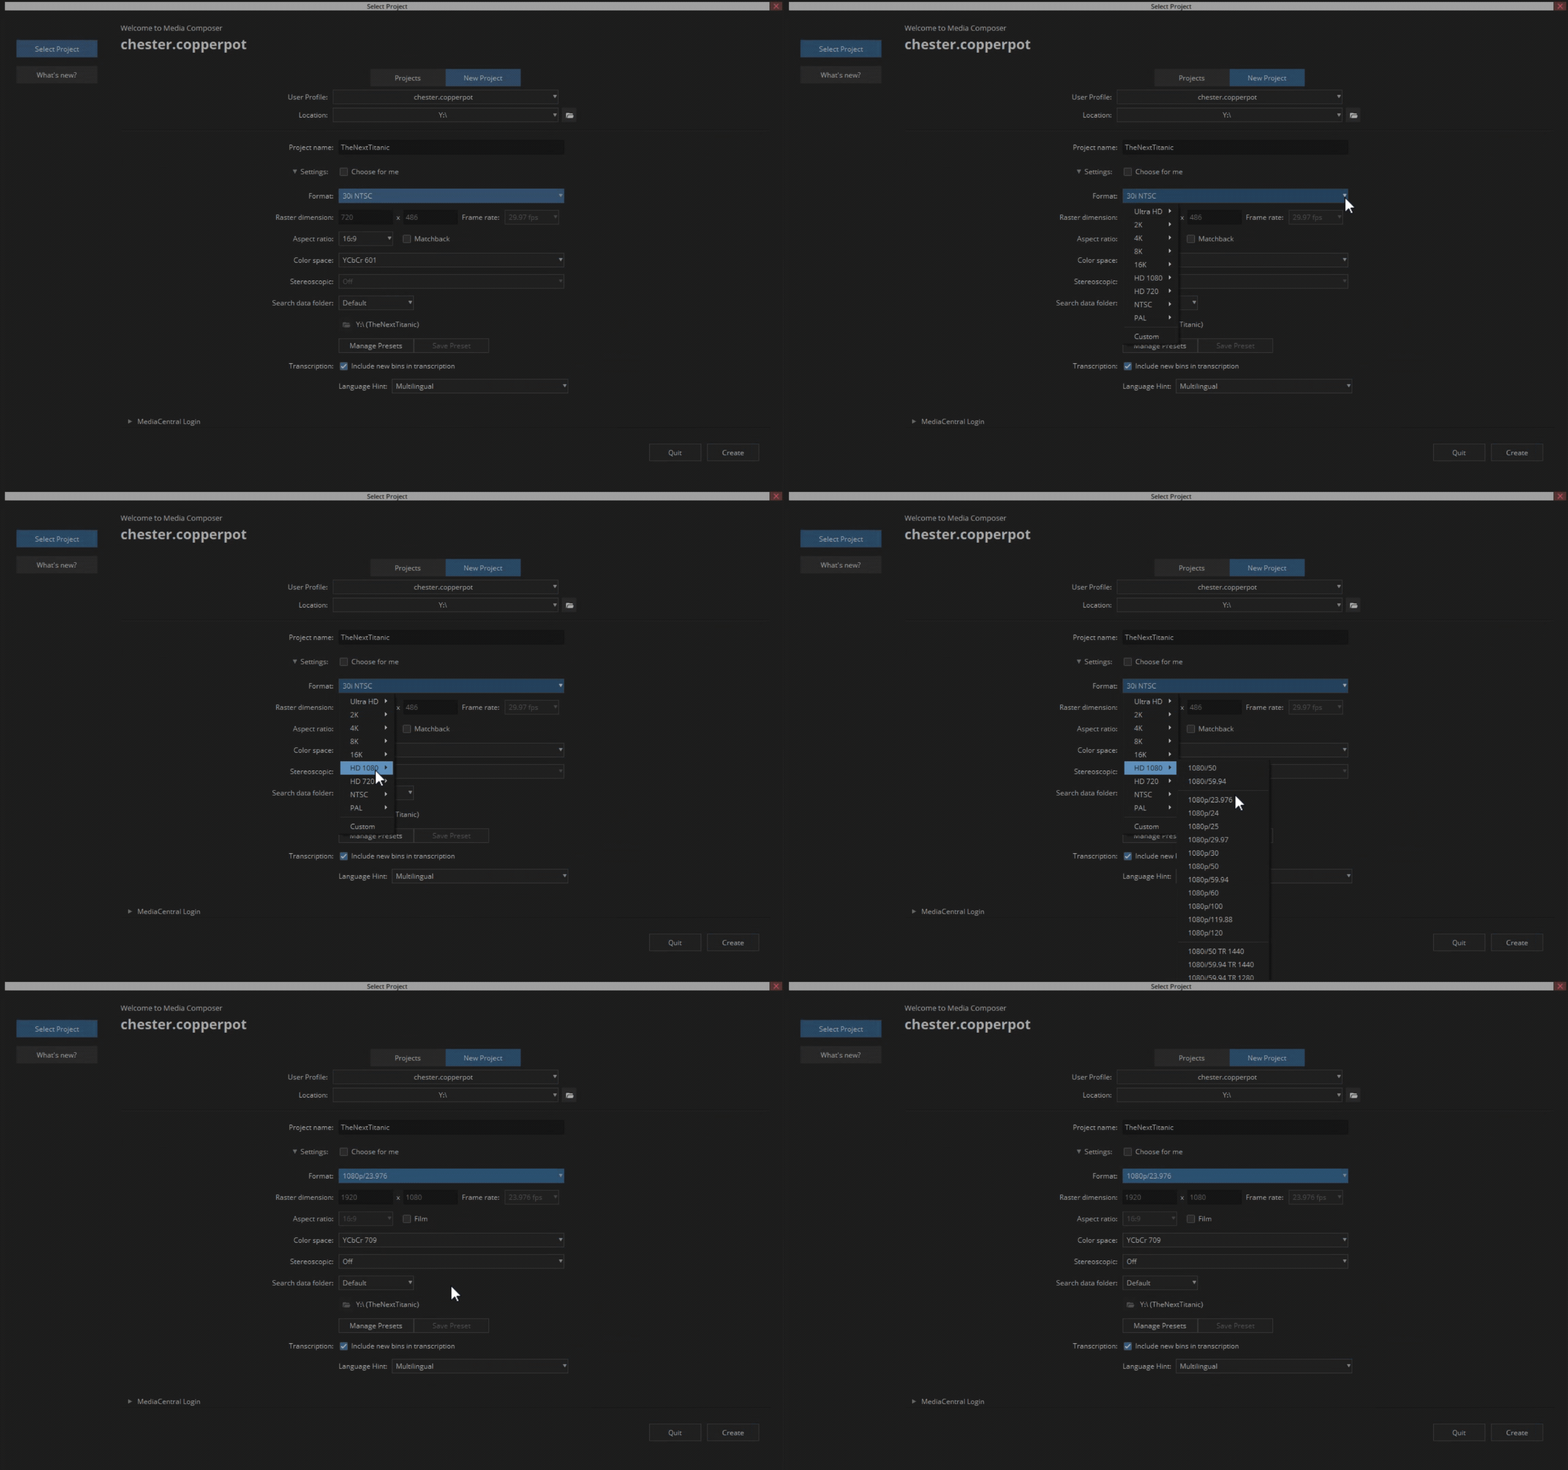
This step is crucial when creating your Avid Project. An incorrect format and frame rate when creating a project can lead to some big hurdles down the line. When building your project, confirm the format and frame rate of your OCM before creating the project.
To change the format:
- Navigate to "Settings"
- Click on the menu next to "Format:"
- In the menus below, find the format and frame rate that matches your OCM
Setting the Search Data Folder
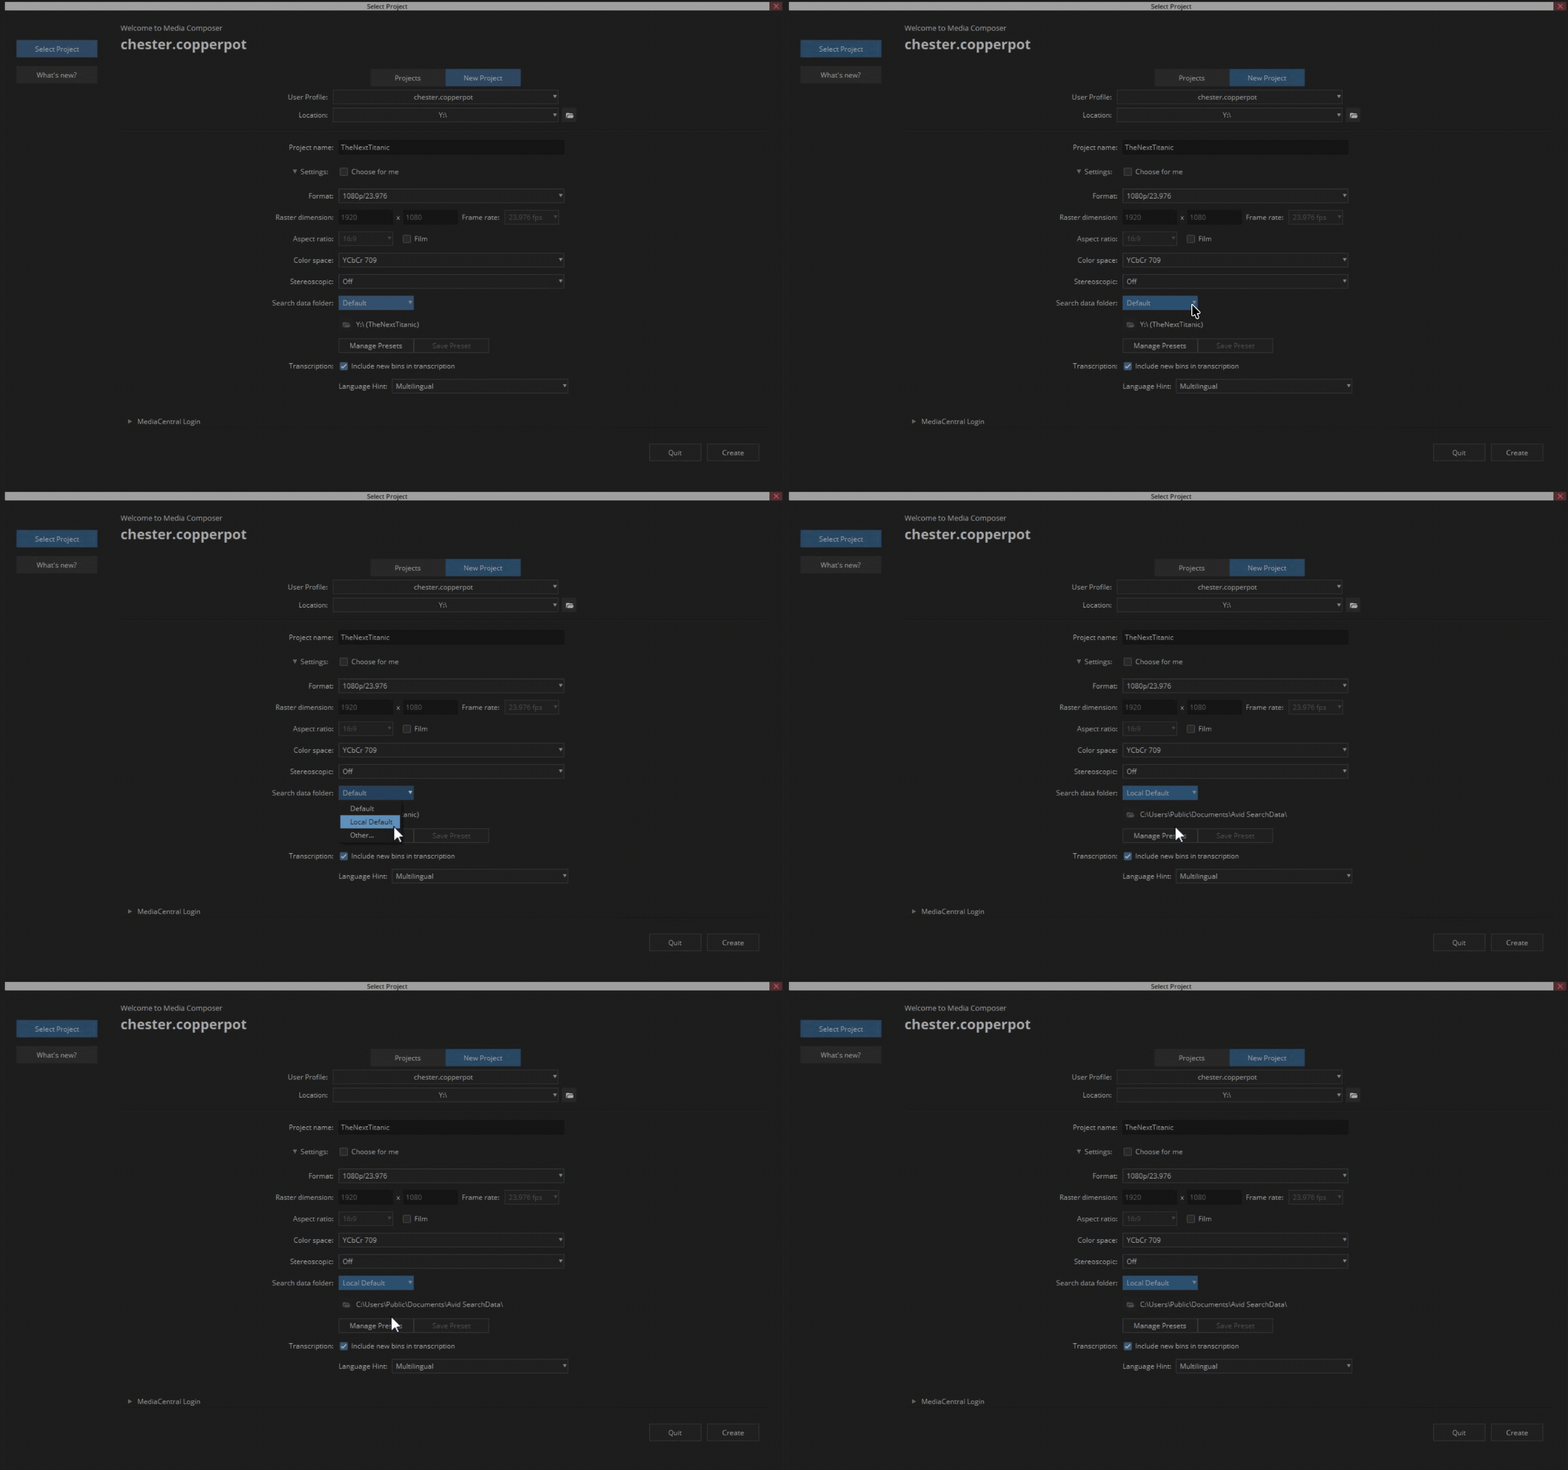
Search data is saved into a database that will grow and grow as the project is worked on. To ensure optimal responsiveness in Media Composer, it is important to change this database's location from the Projects drive to the "Local Default". Here's how to change this:
- Navigate to "Search data folder"
- Click on the down arrow that says "Default" and click "Local Default"
Transcription
At the bottom of the New Project tab, there are two options for Transcription: "Include new bin in transcription" and "Language Hint". When setting up the project, it would be best to discuss with your team how transcripts will be handled. If all bins should be transcribed, then the option should be left checked. If only specific bins need to be transcribed, it is best to uncheck this option and select which bins will be included in transcription later.
For the language hint, it is best to set this to the primary language to English, unless your project will have multilingual transcripts, in which case the default option can be left on "Multilingual".

Important Notes:
Something important to note is that MOST of the options that you set in project creation can be changed at a later date without causing major issues in a project. The key things that cannot be changed later are:
- Avid Project Name
- Avid Project Save Location
- Project Frame Rate
If any of the above need to be changed, you will need to rebuild your Avid Project. Incorrect frame rates can also lead to sequences needing to be recreated, so it is imperative to know the correct format and frame rate before setting up your initial Avid Project.