This guide will help you download, install, and configure the Teradici PCoIP Client on your Personal Computer to connect to a remote workstation on Frame One. The PCoIP protocol (Personal Computer over Internet Protocol) enables secure, high resolution, high frame rate, low latency remote desktop access. Before following this guide, confirm that your Personal Computer meets our system requirements and activate your account.
Download
Download the installer for your operating system:
| MacOS 10.14* | MacOS 10.15+ |
* The Legacy macOS installer does not include the latest bug fixes and features. We recommend updating to at least macOS 12 Monterey for optimal performance.
Install
Unzip the download and run the Frame One installer application. This will install PCoIP Client into your Applications folder and pre-configure it. When you run PCoIP Client for the first time, you'll need to approve a few security settings. These are:
- USB Redirection (required) - This legacy driver helps connect USB peripherals like tablets to your workstation. MacOS 10.15 and later will not load the driver, but it is still worthwhile to allow it to attempt to install (PCoIP will keep bugging you otherwise.)
- Microphone Access (optional) - Microphone access bridges your Personal Computer's microphone to your remote workstation's input. This allows you to record scratch audio directly on your remote workstation in real-time.
- Accessibility (required) - Accessibility access helps capture key combinations properly in PCoIP Client.
Downlad the installer and run it. It's as simple as that!
Configure
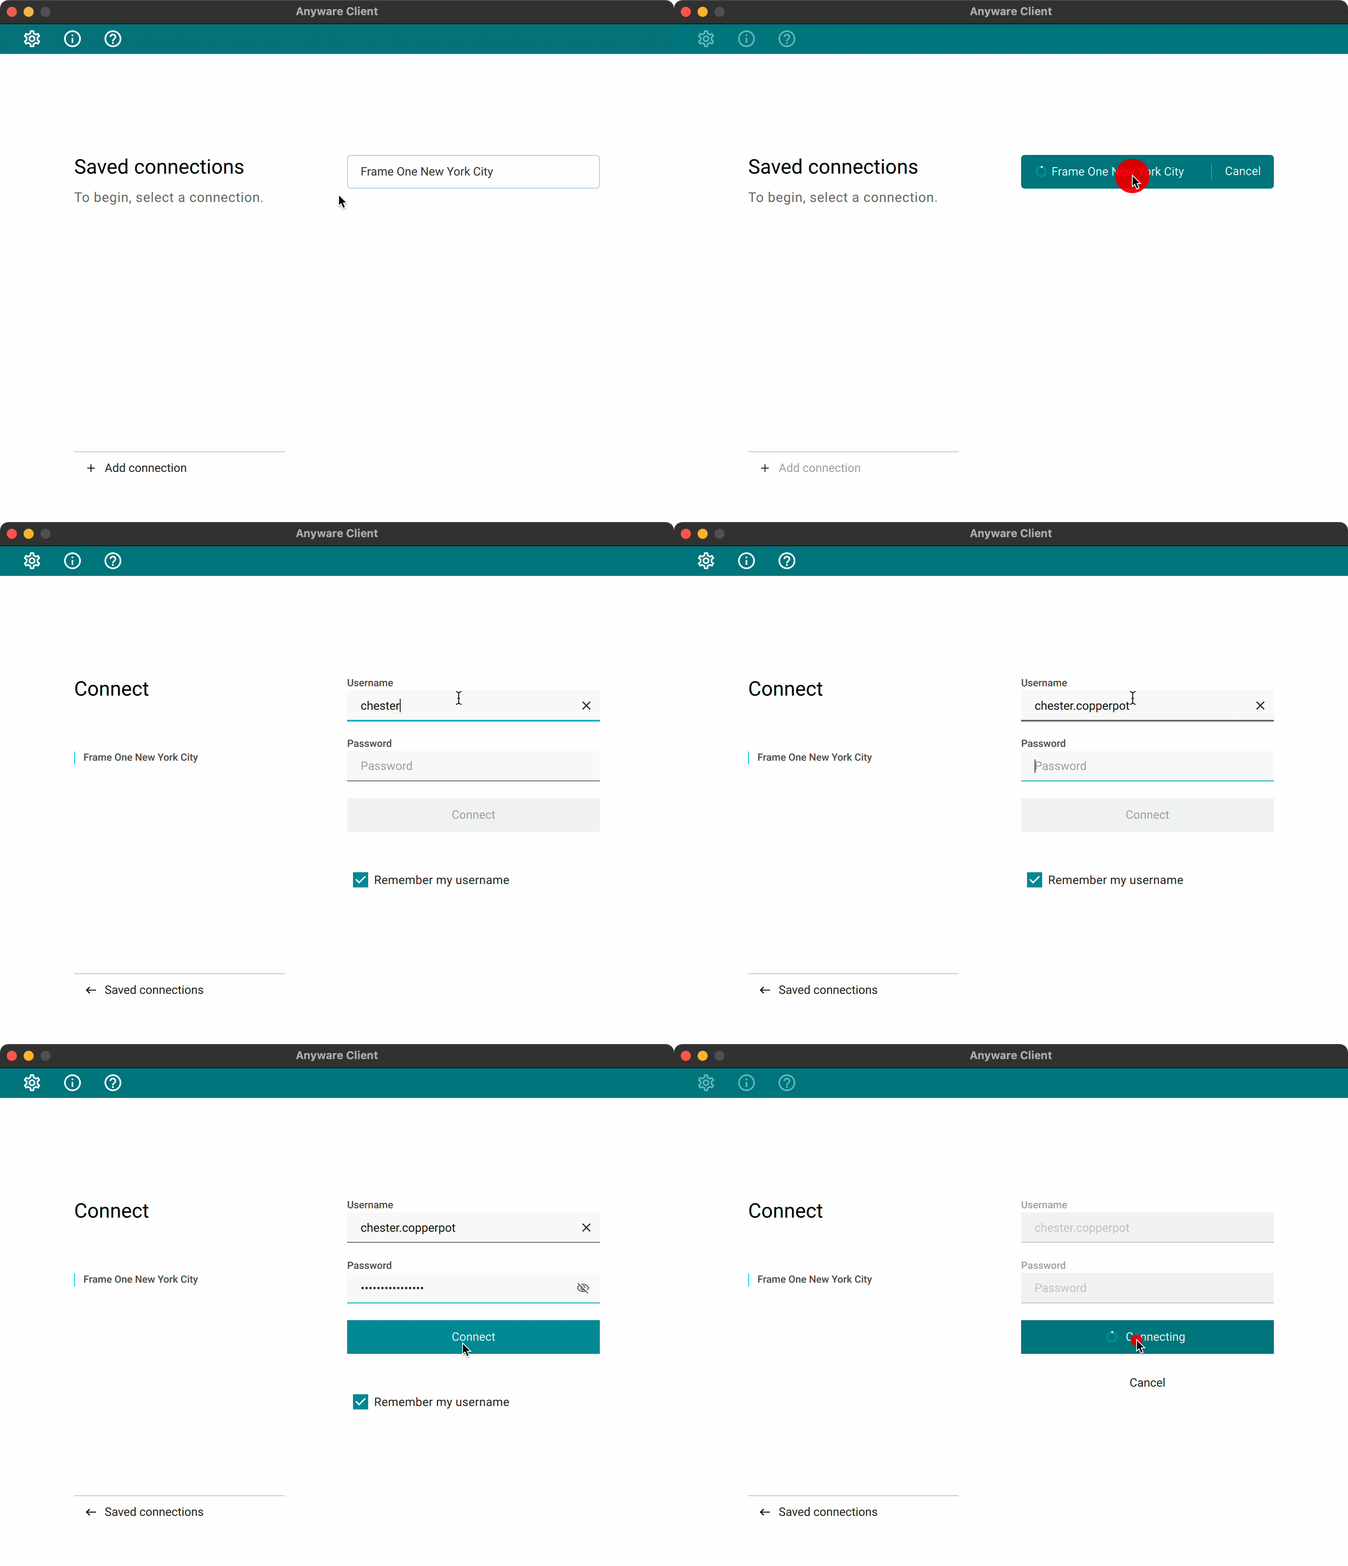
- Select New Connection and enter the appropriate host address and connection name from the table below. Contact Support if you are unsure which connection address to use. Copy the information from the table, then press Add connectionHost AddressConnection Namenyc.frameone.comFrame One New York Citylax.frameone.comFrame One Los Angeles

- Select your newly created connection preset. Then on the next name enter in your username (typically firstname.lastname) and your password.

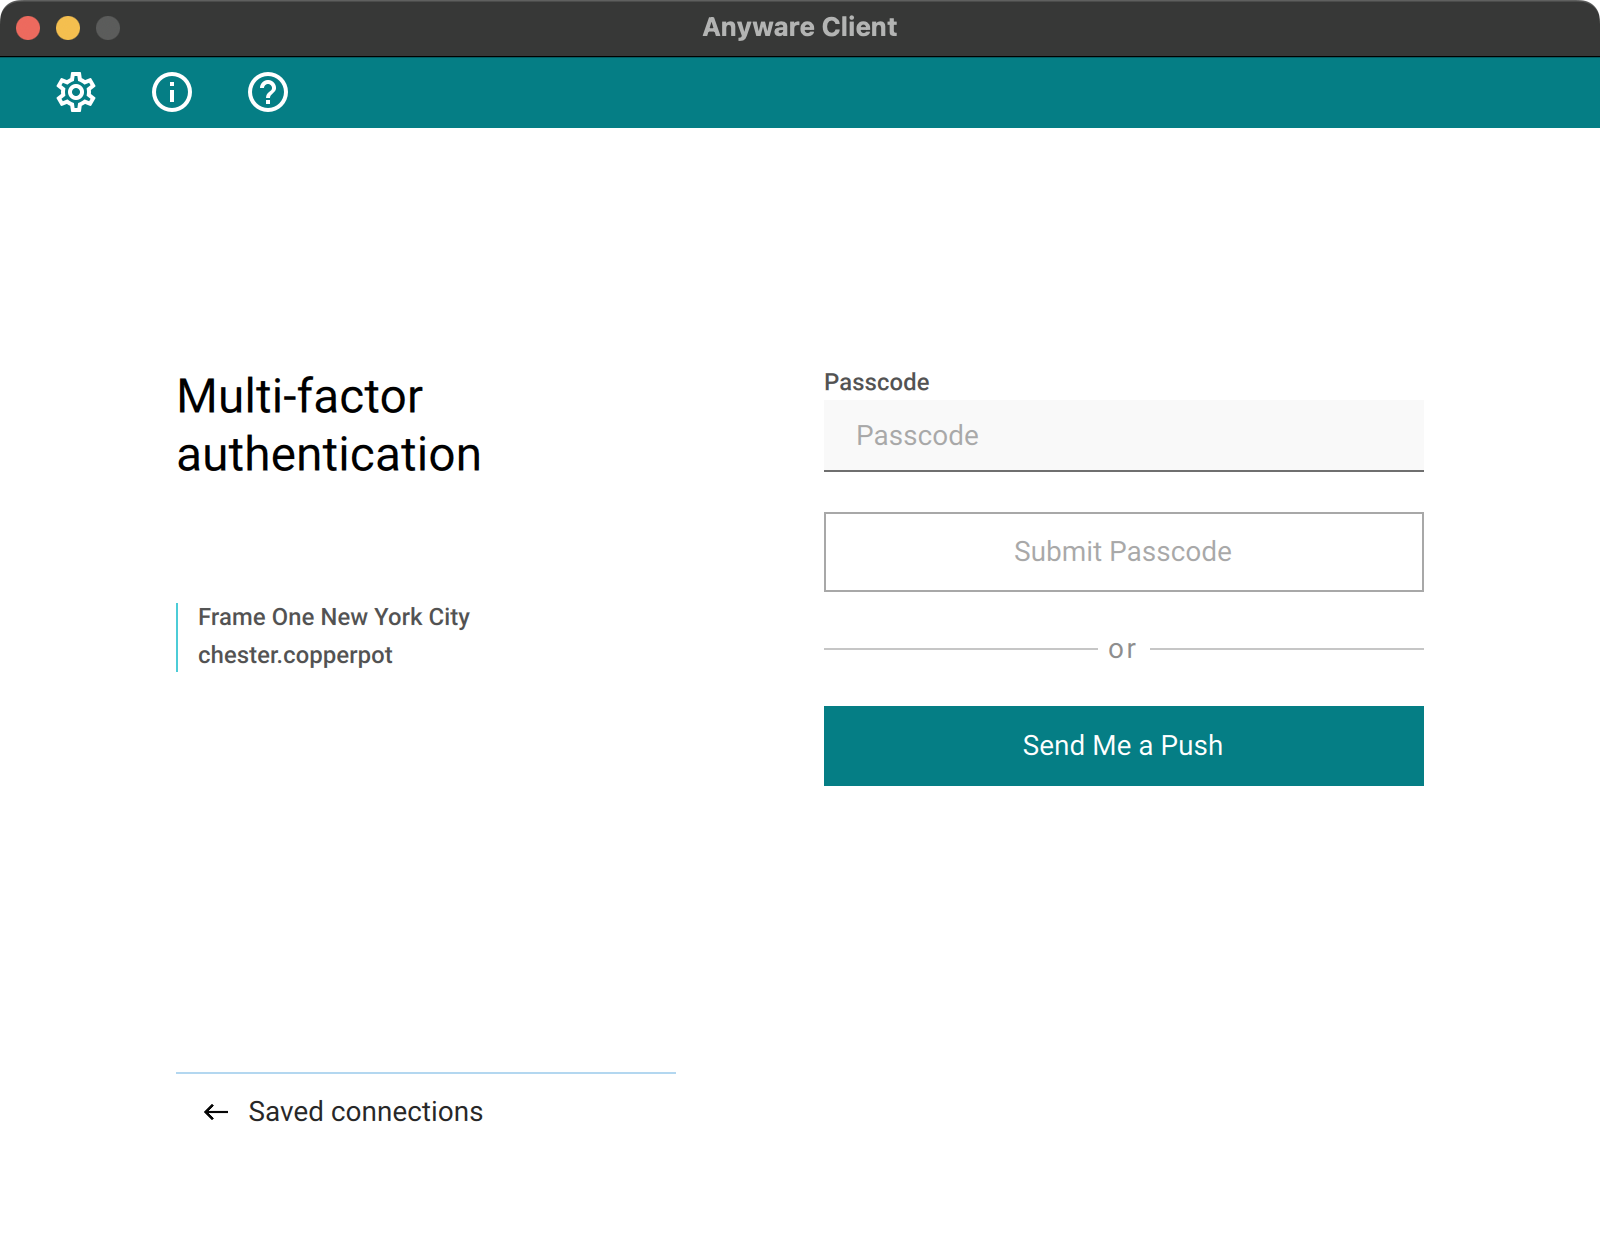
- Frame One utilizes modern Multi-Factor Authentication (MFA) to verify your identity. On the next screen, if you activated your account with Okta Verify, click Send Me a Push. A notification on your phone will help you pass MFA in two taps! If you are using Google Authenticator or another password generator, enter the six-digit passcode from your phone an then click Submit Passcode. Once confirmed, your remote session will connect in about 10 seconds.

- Your remote workstation will be windowed the first time you connect. You may resize this window to regenerate your virtual display. Select View > Show Fullscreen or Show Fullscreen All Monitors from the toolbar for a more immersive experience. The menu and dock will automatically hide, but they can be revealed by placing your mouse pointer at the edges of the screen. You may hide PCoIP as needed through the menu toolbar as well by selecting PCoIP Client > Hide PCoIP Client.

- To end your remote session, reveal the menu bar and select Connection > Disconnect. You will disconnect, but your remote workstation continues to run. Consider closing any shared bins others may need to work on before disconnecting. And if you are sharing your remote workstation with another user, you can read about other sign-off considerations here.

- Should you ever need to restart your remote computer, save and close all programs on the remote workstation. Then click on the Start Menu >Power > Restart. Your remote session will automatically end. Allow 5-7 minutes for the workstation to restart before connecting again with PCoIP Client. If you have any trouble reconnecting, Contact Frame One Support.
